 |
|
|
|
Thank You from the Too Much Media Execs
|
|
|
We wanted to take a moment and thank our clients and colleagues throughout the industry for nominations at the upcoming Xbiz Executive Awards in Los Angeles.
"In an industry where technological advances are at the forefront, we strive to continually innovate our product offerings and provide guidance to help you achieve success with our tools", said John Mauser.
"As the new year approaches, these are exciting times at Too Much Media. Thanks to feedback and collaboration from industry colleagues, our team is working diligently to provide advances on the next generation of our NATS software. We are also excited to be educating both current and prospective clients on our newest platform, NATS for Networks," said John Albright.
If you'd like to cast your vote for Mauser or Albright, please visit the following link.
John Albright for the Tech Leadership Award
John Mauser for the Business Development Executive of the Year.
Again, many thanks to all of our clients and industry peers who nominated us. It is truly an honor.
|
|
|
|
|
Highlighted Features
|
|
|
|
|
Memcached in NATS
|
|
|
Program owners can make use of a PHP class named Memcached to speed up tracking requests. Using this feature with NATS will allow frequently requested data to be stored in your servers memory rather than just on your hard drive. This will allow important data required during the tracking process to be retrieved much quicker.
Before configuring Memcached within NATS, you will need to have your host add the PHP Memcached class to your server. Next, you or your host will add the Memcached configuration information directly into the NATS config.php file detailing the Server IP, the Port, and the Memcached expiration. Once saved, NATS will start using this feature right away.
For further details in regards to Memcached and it's setup, please visit our online documentation. If you need assistance with the set up on your server, please put in a support ticket with us here.
|
|
|
|
|
|
|
Configure Site Redirect
|
|
|
Want to retire a site's tour or campaign but don't want to lose the traffic being sent there? NATS includes a Site redirect feature which allows you to easily redirect surfers while still maintaining Affiliate credit. This allows you to ensure Affiliate traffic is being sent to the best URL for your program.
 Create site redirects to forward traffic from unused tours Create site redirects to forward traffic from unused tours
For each site in the Sites Admin, there is an action icon to "Configure Redirects". Once on this page, you can view/manage redirects already set up, or add a new redirect into your system. When adding a new redirect, you will define where the site traffic will be redirected to. This may include changing to a new tour, a new program, or even a new URL altogether. Additionally, you can define:
- The percentage of traffic to be redirected.
- Whether you want the redirect to be tracked separately.
- If you wish to have the original hit to not be counted.
- If you wish to have the query string provided passed along through the redirect.
- If the redirect should be "Enabled By Default".
Once added, if "Enabled By Default" was not set for the redirect, you will need to click the "Set Active Rules" action icon and tell NATS when the redirect will actually take place.
For more details on the set up and configuration of Site Redirects, visit our online documentation.
|
|
|
|
|
|
|
Copying Join Option Rules
|
|
|
Do you need to replicate rule settings across multiple join options? NATS includes the ability to copy one or more rules from one join option to another. This allows for options to be customized at a greater pace.
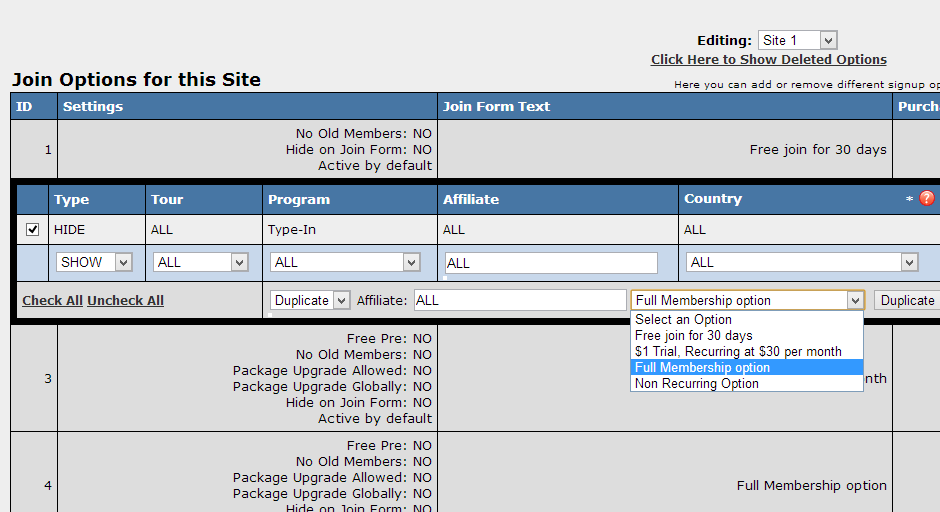 Copy join option rules from the Admin Copy join option rules from the Admin
When editing the rules for any join option, there will be an area at the bottom of the rule list allowing you to copy one or more rules to a different option. To make the copy, select one or more of the check boxes on the left of the rules in your list. Next, find the form at the bottom of your rule list. Select "Duplicate" in the first drop-down, and then select the new join option in the second drop-down. Once you press the submit button, the selected rules on this page will be copied to the join option that you have selected.
In addition to copying join option rules, you also have the ability to disable one or more rules using the same feature that was mentioned above. Once on the edit rules page for a single join option, you will select one or more of the rules using the check boxes on the left of the list. Next, find the drop-down box near the bottom of the list and change it to Disable. Don't forget to click the submit button.
For more information on setting join option rules, please visit our online documentation.
|
|
|
|
|
|
|
|
|
|
|
|
|
|
|
|
|